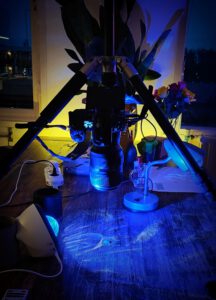
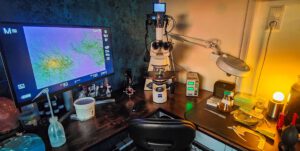
I have always loved photography for it allows us to capture the world from unique perspectives and you always discover things you have never seen before. I specialise in two forms of photography that provide a closer look at the minute details of our world . They are micro and macro photography. While they may sound similar, they each have distinct techniques and applications. Let’s delve into what micro and macro photography are, their technical aspects, and how they differ.

Macro Photography
Macro photography involves capturing small subjects at a magnification ratio of 1:1 or greater, meaning the subject appears life-size or larger in the resulting photograph. This technique is often used to highlight the intricate details of flowers, insects, and other tiny objects.
Technical Aspects:
- Lenses: Macro photography typically requires a macro lens, which is specifically designed to focus at close distances. These lenses usually have a high reproduction ratio, allowing them to capture subjects at 1:1 magnification or greater. At the moment I work with a AF-S Micro-Nikkor 105mm f2.8G IF-ED lens. Read more about macro lenses here.
- Depth of Field: One of the challenges in macro photography is achieving a sufficient depth of field. At high magnifications, the depth of field becomes very shallow, making it crucial to carefully manage focus.
- Lighting: Adequate lighting is essential to illuminate the tiny subjects. Photographers often use ring lights or diffused flash units to evenly light the subject and avoid harsh shadows or highlights.
- Stability: To avoid camera shake, which is amplified at high magnifications, using a tripod is highly recommended. I also employ remote shutter releases and timers to minimize vibrations.
- Focus stacking: A technique used to achieve greater depth of field in images where a single shot can’t capture the entire subject in sharp focus. It involves taking multiple photographs of the subject at different focus distances and then combining them using specialized software. I use Zerene stacking software for this purpose. This process results in a single image where all parts of the subject are in sharp focus, providing a clear and detailed representation of the intricate details.
Applications: Macro photography is widely used in nature photography to capture the beautiful details of flora and fauna. It’s also popular in product photography, particularly for items like jewellery and electronics, where fine details are important. Read more about macro photography here.

Micro Photography
Micro photography, also known as photomicrography, involves taking photographs through a microscope to capture details that are not visible to the naked eye. So in this case the microscope is your camera lens. This technique is used to magnify subjects at much higher levels than macro photography, often at magnifications of 10x to 1000x or more. It is often used to capture the beauty of microbes, minerals, microplastics and the smaller details of flowers and insects and much more.
Technical Aspects:
- Microscopes: A microscope is essential for micro photography. These can be optical microscopes for visible light photography or electron microscopes for even higher magnifications. I have a Zeiss Axioskop 2 light microscope at home. With options for DIC, Darkfiel d and Polarized light. Read more about microscopy here.
- Camera Mounting: Special adapters are used to mount a camera to the microscope. These adapters ensure that the camera’s sensor is properly aligned with the microscope’s optical path. I have one specifically adjusted for my Nikon Z7ii camera.
- Illumination: Proper illumination is crucial in micro photography. Microscopes often come with built-in lighting systems, but additional lighting can be used to enhance image quality. I prefer to work with the LED lighting system of BW-OPTIK. They can rebuild your standard microscope light housing to a LED system. In addition I sometimes used extra external lighting to light the object from above.
- Focus Stacking: Because of the extremely shallow depth of field at high magnifications, micro photographers use focus stacking, maybe even more then macro photographers. It involves taking multiple images at different focus planes and combining them to produce a single image with greater depth of field. Next to the Zerene stacking software i use the Micromate of WeMacro, connected to my camera, to stack the images.
Applications: Micro photography is primarily used in scientific research to document the microscopic world. It is invaluable in fields such as biology, medicine, and materials science, where it helps in studying cells, microorganisms, and tiny structures…………
Key Differences
- Magnification Levels: The most significant difference between the two is the level of magnification. Macro photography generally deals with magnifications from 1:1 to 10:1, while micro photography starts at around 10x and can go up to thousands of times magnification.
- Equipment: Macro photography uses specialized macro lenses and often additional lighting equipment, whereas micro photography relies on microscopes and camera adapters.
- Applications: Macro photography is common in nature and product photography, highlighting visible details. Micro photography, on the other hand, is predominantly used in scientific research to explore the microscopic world.


